A technique we used extensively in STS still applies to WSS: How to get data from your SharePoint lists in XML format. It's actually quite simple, and you don't need to use web services to get it.
WSS supports a number of protocols to interact with the data. SOAP and WEBDAV immediately come to mind for most of you, but you may be forgetting the elusive URL Protocol (GET). Luckily for you, it's simple to use, and returns data in the MS-standard rowset stream format.
Follow along with these steps, and you'll be pleased with the results, I'm certain.
Determine the GUID of a list whose data you need in XML.
Navigate to the allitems.aspx view of the list in question
Click the "Modify Settings and Columns" link on the left side
Copy the List's GUID (including curly braces) from the address bar
Construct the URL to retrieve the list's data in XML format (it's case sensitive, be careful!)
The requested object is http://servername/sitename/_vti_bin/owssvr.dll
The object will expect three parameters: Cmd, List and XMLDATA (case sensitive)
Since we're displaying items (in XML format), the value of the Cmd parameter should be Display
We want to grab the list whose GUID we determined in step one; the value of the List parameter is this GUID (including curly braces)
Of course, we want XML data to be returned; the value of the XMLDATA parameter will be TRUE
Putting this together, we get a URL that looks like this:
http://server/site/_vti_bin/owssvr.dll?Cmd=Display&List={E1D9FED5-2531-413F-8C0F-CAA5C6280E51}&XMLDATA=TRUE
Sit back and marvel at how easy it is to get a rowset out of SharePoint without using the Object Model or the Web Services. You can point a Data View web part to this URL and grab data from another SharePoint site without adding the whole site to your DV catalog listing.
You may find that it doesn't return EVERY field. That's right: It returns fields that are defined in the default "allitems" view of that particular list. If you want more fields, you have two choices:
Modify the allitems.aspx view to show more fields (easy)
Pass an additional URL parameter, View, with the GUID value of the view whose fields you want to return (a little more involved/tedious)
Friday, July 25, 2008
Feature Stapling
One of the big problems people faced in WSS (V2) was that user was not able to customize out of the box site definitions. One of the big reasons for this was that we might need to update that site definition in a Service Pack and overwrite user changes.
So what happens if you want to associate a Feature with a site definition?
Well, as you should know by now, it is not advisable to modify the out of the box site definitions. So how do you do this?
This is where Feature Stapling comes in...
Feature Stapling allows you to “staple” a Feature to a site definition without modifying it in any way. This means you can add your feature to all sites created using that site definition.
The idea is that you can staple a Feature to a configuration defined within a site definition so that the Feature is automatically activated whenever a new site is provisioned from that specific configuration.
To create a staple you actually create another Feature that does the staple. The second Feature must provide a FeatureSiteTemplateAssociation element which specifies the identifying GUID of the target feature along with a formatted string used to identify a site definition and a target configuration.
for example:
<FeatureSiteTemplateAssociation Id="29D85C25-170C-4df9-A641-12DB0B9D4130" TemplateName="STS#0" />
This is very powerful as it allows you to add functionality to site definitions without having to modify the site definitions themselves.
Now ... one last final note on this, if you want to staple your Feature to ALL site definitions then you can staple it to the GLOBAL site definition and it will be added to all sites that are created.
Thursday, July 24, 2008
SharePoint Designer - how to edit a page?
In SharePoint 2003 (WSSv2) with FrontPage, it was so easy to edit a page. Just open the page you want to edit in Internet Explorer and hit the "Edit in FrontPage" icon at the toolbar.
Well, the good news are that in SharePoint 2007 (WSSv3) the same applies, but only for some of the pages, while other pages will tell you "This page cannot be edited in SharePoint Designer".
This article will explain what is going on, and how to get each type of page to be editable in SharePoint Designer.
Lets start easy- when you create a WSSv3 web site from one of the default template such as team site, blank site etc...you will have no problems using the easy button -edit in SharePoint Designer.You can also open the SharePoint site or page for editing from within SharePoint Designer using the "Open Site" or "Open.." dialogs within the application.
When you open such a page from such a site directly from Internet Explorer, or from SharePoint Designer, you will see the page in SharePoint Designer, and be able to modify it using the designer mode or the code mode.
So far so good right?
So lets figure out why some of the pages give us the following message when we try to edit them in SharePoint Designer:
"This page cannot be edited in SharePoint Designer. You can edit the content in the browser, or edit the corresponding page layout in SharePoint Designer"
Why is that? well, simply because the page you are trying to edit is under the publishing feature. It is a publishing page, and as such, by default, gets it's layout from the layout page and the master page.
The only change you should be doing on such a page is edit it in the browser and add\remove\change web parts in it.
However, there is a way to work around this - detach it from it's layout page. This is similar to the ghosting\unghosting process that we had back in SharePoint 2003 (WSSv2), but with the added benefit that we can allways roll back the change.
It also means that in the first time you will edit that page, you will have to start from SharePoint Designer to do it:
Open the site that contains the page in SharePoint Designer (use "File>Open Site") and browse to the page you want to edit in the folder list.
Right click the file, and choose "Detach from page layout". This will unghost the file - copying it's layout from the layout page into the database, and so allowing you to edit it, just like you used to do in SharePoint 2003
Unlike sharepoint 2003, you can take it back, and reattach the file.
Wednesday, July 23, 2008
Leverage SPUtility.ValidateFormDigest() for CSRF mitigation
To protect against cross-site request forgery, be sure your custom built aspx pages call SPUtility.ValidateFormDigest(). Sharepoint pages includes a hidden token in the postback which is unique to the user and the request. ValidateFormRequest() can be called in your custom aspx pages directly, or if you inherit from the WSS master page, to ensure you’re leveraging this same protection.
If your code is processing a POST request then make sure you call SPUtility.ValidateFormDigest() before you do anything else. This will ensure that the post request is validated (that it is not a cross-site scripting attack) and after that you will not have to worry about AllowUnsafeUpdates, because its default value will be “true” after the form digest is validated.
Don’t enable AllowUnsafeUpdates property to true. When set to true the AllowUnsafeUpdates value tells Sharepoint to allow actions and data from GET requests to modify the database. By not allowing GET requests to modify data (this is the default), you’ve effectively protected against CSRF attacks which exploit GET requests. This is supplementary to ValidateFormRequest() above which only works with POST requests.
Tuesday, July 22, 2008
SharePoint Elevated Privilege without RunWithElevatedPrivelege
You may need to elevate privilege if the current user doesn't have permission to read that object from the SPSite. In this case, you'll need to elevate privilege just to get the user token, but we don't want to perform any operations inside RunWithElevatedPrivilege, we only want to get a token out (which is basically a simple byte array). You could also cache the system token in the application if you needed to.
Best Practices for Elevated Privilege in SharePoint:
Elevated Privilege can be used to bypass or work with security, and can be performed either through SPSecurity or through impersonation techniques involving the SPUserToken and the SPSite class. It's one of the most misunderstood aspects of the SharePoint API, but in general you should always prefer impersonation using the SPSite class and SPUserToken objects. Here's my list of best practices for elevated privilege code in SharePoint that will help you create more reliable applications for the enterprise.
• Avoid using SPSecurity.RunwithElevatedPrivilege to access the SharePoint object model. Instead, use the SPUserToken to impersonate with SPSite.
• If you do use SPSecurity.RunwithElevatedPrivilege, dispose of all objects in the delegate. Do not pass SharePoint objects out of the RunwithElevatedPrivilege method.
• Only use SPSecurity.RunwithElevatedPrivilege to make network calls under the application pool identity. Don't use it for elevation of privilege of SharePoint objects.
• Always use the SPSite constructor with an SPUserToken to create an elevated privilege security context in SharePoint. To impersonate the system, use the SystemAccount.UserToken property of the current SPSite context, such as:
var site = new SPSite(SPContext.Current.Site.ID, SPContext.Current.Site.SystemAccount.UserToken);
• Avoid passing SharePoint objects between different security contexts (SPSite instances), with the exception of the SPUserToken used in the SPSite ctor. An SPUser object created from SPSite A cannot (reliably) be passed to SPSite B. This can be the source of obscure bugs in production that are difficult to reproduce in development. For example, an SPUser reference created from SPContext.Current.Site cannot reliably be used in an elevated site context, as the user reference may take on a different meaning in the alternate context.
• Never use elevated privilege to bypass security-- always use it to work with security.
• Restrict what assemblies can use elevated privilege by running in minimal trust, avoiding the GAC, and auditing any CAS policies deployed with vendor solutions.
A better way to do perform system actions is to impersonate the SHAREPOINT\system account. Impersonation is a concept that is built into the object model, but is underutilized by developers.
The SPSite object takes an SPUserToken object in its constructor in order to support impersonation. (This does require Impersonate="True" for the Microsoft.SharePoint.Security.SharePointPermission permission class). You can impersonate any user when creating the SPSite context-- so to get the system account, just use the magic system account "SHAREPOINT\system".
Here's a code sample of SYSTEM ACCOUNT impersonation. The SYSTEM ACCOUNT uses the login name "SHAREPOINT\system" internally while it will use the process identity (usually that means the application pool identity, but it could be the service identity if a task was run as a timer job) when making external network calls. Note that the account is abstracted, and when a request comes into the system AS this account it will take on the identity of SYSTEM ACCOUNT.
Here's the code sample. Grab a user object, and then grab the SPUserToken for impersonation:
var user = SPContext.Current.Web.AllUsers[@"SHAREPOINT\SYSTEM"];
var superToken = user.UserToken;
using (var site = new SPSite(SPContext.Current.Web.Url, superToken))
{
// This code runs under the security context of the SHAREPOINT\system
// for all objects accessed through the "site" reference. Note that it's a
// different reference than SPContext.Current.Site.
using(var elevatedWeb = site.OpenWeb())
{
// Perform actions as SYSTEM here
}
}
Because the thread identity hasn't changed, this will produce more stable code in most circumstances, although you should be aware that ONLY objects that are referenced from the elevated site context will run as system.
Wednesday, June 25, 2008
Install SSRS web parts in native mode
If you want to access report server content on a SharePoint site from a native mode report server, use the SharePoint 2.0 Web Parts that are included with Reporting Services.
Web parts are delivered to a SharePoint server as a cabinet (.cab) file. Run the Stsadm.exe tool on the .cab file from the command line to install the Web Parts. The Stsadm.exe tool is included in a SharePoint installation.
1. Copy the RSWebParts.cab to a folder on the SharePoint server. The .cab is installed with Reporting Services. By default, it is located in the C:\Program Files\Microsoft SQL Server\100\Tools\Reporting Services\SharePoint folder. You can copy it to any folder on the SharePoint server, and then delete it later after you install the Web Parts.
2. On the computer that has the installation of the SharePoint product or technology, open a Command Prompt window and navigate to the folder that has the Stsadm.exe tool. The path will vary depending on which version of Windows SharePoint Services you are running. If you are using Windows SharePoint Services 3.0, the path is C:\Program Files\Common Files\Microsoft Shared\web server extensions\12\BIN.
3. Run Stsadm.exe on the .cab, using the following syntax:
STSADM.EXE -o addwppack -filename "C:\ Program Files\Microsoft SQL Server\100\Tools\Reporting Services\SharePoint\RSWebParts.cab" -globalinstall
Specifying -globalinstall adds the Web Parts to the global assembly cache (GAC). This step is necessary if you want to connect the Web Parts.
After you install the Web Parts, you can add them to a Web Part Page on a SharePoint site. You must have permission to create Web sites and add content.
Using SSRS Reports in SharePoint integrated mode with Custom Authentication
Just sharing the problem that we faced while deploying SSRS reports on SharePoint.
SSRS was configured in SharePoint integrated mode with form based authentication. While trying to access reports from report viewer webpart we got following error:
Object moved Object moved to here
This issue was fixed after applying SQL Server hotffix http://support.microsoft.com/kb/939942
When we extended default zone to Internet zone with FBA we got following error:
"The specified path refers to a SharePoint zone that is not supported. The default zone path must be used."
After googling found that SSRS SharePoint integrated mode works only with default zone and it is not supported on any other zones (Intranet, Extranet or Custom).
Following blog has more details on this problem:
http://www.sharepointblogs.com/nrdev/archive/2007/06/21/ssrs-in-sharepoint-2007-site-using-forms-based-authentication-sharepoint-integrated-mode.aspx
Friday, May 30, 2008
Restrict People Picker to users in site collection
There is a property one can set on the web application to constrain the results from the people picker to only those users who are members of the current site already. You may want to do this for multi company hosted environments.
The command line is:
Stsadm.exe -o setproperty –url http://server –pn “peoplepicker-onlysearchwithinsitecollection” –pv yes
The command line is:
Stsadm.exe -o setproperty –url http://server –pn “peoplepicker-onlysearchwithinsitecollection” –pv yes
Tuesday, May 27, 2008
Master Page, CSS Deployment from staging server to Production server using feature
When developer creates files in Publishing site /Team site in a development environment using SharePoint Designer, the files are stored within the site's content database, not on the file system. These types of pages are called "customized" ("unghosted"). While this is fine and good for development, you're going to have some challenges in a real MOSS environment where you'll have developers working on developer machines, a shared development environment, a test environment and a production environment.
Moving this type of files which reside in the content database to different environment can be done by opening each file in development environment in SharePoint designer, copying the contents, creating a new file in your target environment (such as production), paste the contents on the clipboard, save , check- in , publish and approve (in case of Publishing layout). This is a very tedious job if we have more than one file.
Manually copying all customized files from the development server to local file system is very tedious so this process is automated using .NET application. This application reads all master pages and CSS files names from the “ProvisionConfig.xml” so that we can specify which master pages have to be provisioned and copies all the master pages and CSS files into the destination folder specified.
The ProvisionConfig.xml file is shown below:

Once the files are available locally, it has to be updated on the production server. This is done by creating a custom SharePoint feature. “DeploymentFeature” is the custom feature created which is responsible for provisioning the files into the lists and libraries on feature activation. Not only will it provision one file, but it can provision many files at once.
In FeatureActivated event, write the code for updating the master page contents. Checkout the file, update the contents, check in and publish and approve the file programmatically. here is the sample snippet that performs the above mentioned process.
SPList masterPageGallery = site.OpenWeb().Lists["Master Page Gallery"];
// get a handle to the folder we want to upload the file to
SPFile masterFile = masterPageGallery.RootFolder.Files[FileName];
//backup the original file
masterFile.CopyTo(url + filename.Split('.')[0] + "_Original.master", true);
//Check in file
masterFile = masterPageGallery.RootFolder.Files.Add(url + origFile.Name, contents, true);
masterFile.CheckIn("File over-written by activiating the Published Page View Feature");
//Publish the file
masterFile.Publish("File published by activating the Published Page View Feature");
//Approve the file
masterFile.Approve("Approved by Published Page View Feature");
Install the feature and activate the installed feature on the target site.
1. Create a New folder “DeploymentFeature” under the Features directory on web server (production environment) Local Drive:\Program Files\Common Files\Microsoft Shared\web server extensions\12\TEMPLATE\FEATURES
2. Copy all the files (master pages, CSS files) from the local file system to this folder.
3. You are now ready to install the new Feature on the web server. Open a Command Prompt and enter the following:
Change directories to the BIN folder in the 12 hive so you can use STSADM.exe:
cd C:\Program Files\Common Files\Microsoft Shared\web server extensions\12\BIN
Launch STSADM and install the feature:
stsadm -o installfeature -name DeploymentFeature
4. Now we will activate the feature on the site.
Open your site and navigate to the Site Collection Features settings page. Site Actions - Site Settings - Modify All Site Settings - Site Collection Features (under the Site Collection Administration submenu).
The new feature will be listed:
Select Activate
5. The master pages/CSS files are updated.
There are few advantages of using this method:
1. Ability to leverage a rich source control management.
2. Ability to package up the feature (and all its files) in a SharePoint solution.
3. No need for developers to have access to your production environment:
Since the files are in a feature, production administrators can easily install the feature and activate feature on production environment without developers having to open SharePoint Designer to make changes.
4. All files remain ghosted (uncustomized) on the file system:
Since the files are provisioned as Type=GhostableInLibrary which means the content doesn't really reside within the content database, they are on the file system.
Thursday, May 22, 2008
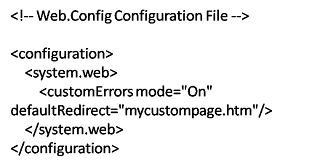
Revealing Unexpected error in MOSS
To enable the details of any specific error message to be viewable on remote machines, please create a tag within a "web.config" configuration file located in the root directory of the current web application. This tag should then have its "mode" attribute set to "On".
When you want all the error messages to be displayed in your custom page, set the file name to defaultRedirect attribute in the tag.
For eg:
When you want all the error messages to be displayed in your custom page, set the file name to defaultRedirect attribute in the
For eg:

Tuesday, February 5, 2008
Integrating LiveID authentication with MOSS
By integrating Windows Live Id (formerly known as Passport) authentication in Share Point extends the Share Point user base to include some of the 350+ million users around the world with active Windows Live IDs. It enables an administrator to add Windows Live ID users to a SharePoint site.
With Windows Live ID Web Authentication, you can use the Windows Live ID service to verify the identity of visitors to your site, so that you can offer personalized access to your site’s content by the millions of registered Windows Live ID users. Windows Live ID provides you with a unique, site-specific identifier for each Windows Live user who signs in to your site. Web Authentication also enables you to incorporate Windows Live controls into your site.
Web Authentication works by sending your users to the Windows Live ID sign-in page by means of a specially formatted link. The service then directs them back to your Web site along with a unique, site-specific identifier that you can use to manage personalized content, assign user rights, and perform other tasks for the authenticated user. Sign-in and account management is performed by Windows Live ID, so you don't have to worry about implementing these details. Windows Live ID profile data is not shared with your site.
MOSS offers excellent security integration with Active Directory – but what if you don’t want to create AD accounts for SharePoint users? Enter custom authentication providers. MOSS enables developers to leverage the pluggable membership provider mechanism of ASP.NET to give SharePoint access to accounts that are not managed by Active Directory.
Login Procedure is as follows:
Click on Sign In :
The Membership and Role providers are linked in to the SharePoint Forms Based Authentication (FBA) architecture. This means that the Sign in and Sign Out mechanisms are integrated right in to SharePoint automagically.
Get Redirected To Live's Login Site:
When you click the Sign In link you will be redirected to the Windows Live ID login site. This site validates the user’s credentials, either by requiring them to login with their Live ID credentials or by validating that they have an active Windows Live session.
Get Redirected Back to SharePoint:
Once the Windows Live session is validated, the Live Login system will redirect you back to SharePoint. The Windows Live system requires an Application Administrator to register a single URL per application ID to return users to once they have been validated. The Windows Live request returns a signed authentication token that the SharePoint server verifies, and then uses to identify the user by their unique user token. This token is unique to each Application that is registered to the Windows Live system. What this means is if I register an application for contoso.com and one for litware.contoso.com I will get a different ID's for the same Windows Live ID on each system. These unique user tokens only provide the SharePoint server with validation that Windows Live has authenticated this user. It does not provide access to the Windows Live associated email, or really any information about the user.
User Token Is Processed:
When the Windows Live system responds to SharePoint, the user token is checked against the profile store. In the case of what I have written, I decided to test Microsoft's statement that with the performance tweaking abilities added to SharePoint, you can technically use a SharePoint list instead of using a SQL table for simple applications. I have set the user token and email columns of the profile list as indexed to help with searching against them. If this user token is new, the user is prompted to enter profile details such as display Name, Email Id etc. This is done to help with adding users to SharePoint sites. Remembering a long user token is difficult to do, however typing in an email address is much easier. The profile store itself is not accessible, unless you have specific access to the list so the data is protected.
Returned To The Sign In Page:
Once either the new user has submitted an email address or the pre-existing user check is completed, you are redirected back in to the SharePoint page you initially signed in from.
Subscribe to:
Posts (Atom)